
The Most Critical Phase
After deciding on your high-performance liner, it can feel like you’ve crossed the biggest hurdle toward establishing an ideal hatchery environment. But in reality, the most critical work has just begun. The best quality geomembrane liner can’t perform at its peak unless it’s installed with the same rigorous attention to detail. Even a premium liner, when installed on a poorly prepared subgrade or with weak seams, is destined for premature failure.
This chapter is a professional’s guide to installation quality control. We won’t cover basic installation steps, which are detailed in our recent Nursery Ponds e-book. Instead, we’ll focus on the key points where top quality is most critical: subgrade acceptance, seam testing, and analyzing common points of failure. The goal is to help you ensure your investment is protected and your containment system is fully reliable.
Starting From the Ground Up: Subgrade Preparation
Earthen Subgrades
A successful in-ground liner installation starts, literally, in the ground. This means the quality of the subgrade—the soil foundation your liner rests on—becomes the first and most critical point of quality control. There’s no escaping it: an imperfect foundation will compromise even the best liner.
Your goal is to create a perfectly smooth, stable, and compacted surface that’s completely free of sharp rocks, roots, or leftover construction debris. Any sharp object left behind represents a potential puncture that can cause a failure even years down the road. Proper grading and compaction ensure the foundation is stable enough to support the immense weight of the water without shifting or settling over time.
For added protection, best practice calls for installing a non-woven geotextile underlayment before deploying the liner. This thick, felt-like fabric shields the liner from any sharp objects that were missed or that could be pushed up by frost heave over time. Best of all, it’s relatively cheap—the best kind of insurance policy for your much larger investment.
Prepping Concrete and Metal Surfaces
Liners installed over hard-surfaced tanks also need protection from any sharp or abrasive points.
For unsealed concrete tanks, inspect the entire surface for rough patches, sharp aggregate, or form lines and grind them down to create a smooth surface. Any cracks or voids must be filled and troweled smooth to keep the liner safe from stress and punctures over these imperfections.
For bolted steel tanks, ensure all bolt heads, nuts, and panel seams are covered or designed to avoid creating a pressure point on the liner. The design might call for specific gaskets, seam tape, or simply installing a protective geotextile underlayment.
Testing the Seams: Your Weakest Link?
Ever heard the saying, “The finest silk can be ruined by a crooked seam”? While no one would suggest using silk to line a hatchery pond, the same concept applies. Seams and pipe penetrations are the most common points of failure. So, how do you make sure there are no “crooked seams” in your hatchery installation?
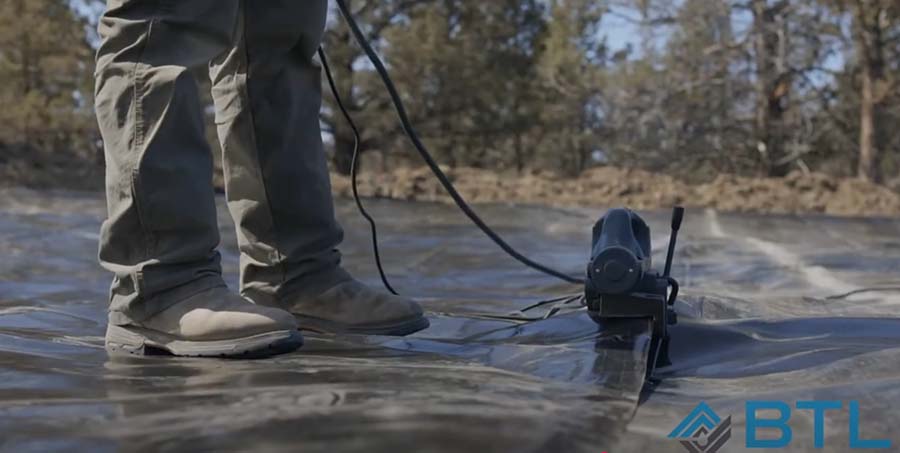
For thermoplastic materials like RPE and HDPE, thermal welding is the industry standard for seaming and most repairs. Hot wedge welders are especially good at quickly creating long, straight seams, using intense heat that essentially melts the separate panels together into a single, continuous piece.
Because the integrity of these seams is so critical, professional installers use rigorous Quality Assurance/Quality Control (QA/QC) testing to verify that every weld is sound before the tank is filled.
There are two primary categories of testing.
Non-Destructive Testing (NDT)
NDT is performed on-site for every inch of field-welded seam to check for leaks or voids.
Air Pressure Testing
This method is used for seams created with a dual-track fusion welder, which leaves a small, enclosed air channel between the two welds. The installer injects air into this channel and monitors the pressure. If the pressure holds steady, the seam is leak-proof.
Vacuum Box Testing
For seams where air pressure testing isn’t possible (like around patches or pipe boots), a vacuum box is used. A soapy solution is applied to the seam, and a clear box with a soft gasket is placed over it. A vacuum is pulled on the box; if any bubbles appear in the solution, it indicates a leak in the seam.
Destructive Testing (DT)
This method provides the ultimate verification of a seam’s physical strength.
During installation, the installer will periodically create sample welds under the same conditions as the main liner seams. The samples are made by the same technician, using the exact same welding equipment, with the same temperature, speed, and pressure settings, and under the same ambient environmental conditions (temperature, humidity, etc.). This ensures the lab results for the test weld accurately reflect the strength and quality of the welds in the finished liner.
Small coupons are cut from these samples and sent to a lab where they are physically pulled apart in shear and peel tests. This is the ultimate proof that the welder, the equipment, and the technique are producing seams strong enough to meet the demands of the job.
Where Installations Go Wrong (And How to Prevent It)
Even with a great liner and perfect seams, an installation can still fail. The weak points aren’t usually in the middle of a panel; they’re at the edges and interruptions where the liner is cut or joined to other components. Improper installation is a leading cause of liner system failure, and it almost always happens at one of these common trouble spots.
Pipe Penetrations
By far, the most common source of leaks is where a pipe for a drain or inlet passes through the liner. Simply clamping the liner around a pipe with a sealant is a recipe for a future leak, as temperature changes and settling will eventually break the seal. The professional solution is to use a pre-fabricated pipe boot made of the same material as the liner. The boot’s flange is welded directly to the main liner, creating a single, flexible, and permanent seal.
An Imperfect Foundation
As we covered earlier, a liner is only as good as the surface it rests on. A slow leak that appears months after installation can often be traced back to a single imperfection in the foundation beneath it.
For earthen subgrades, the culprit is usually a sharp rock or root that was missed during preparation. This is why meticulous prep and a protective geotextile underlayment are your key to success.
For concrete or steel tanks, the danger comes from rough patches, sharp weld seams, or uncovered bolt heads. These create pressure points that can abrade or puncture the liner. Since this damage can occur over time and out of sight, proper surface prep and underlayment are just as critical as for earthen subgrades.
Damage During Deployment
Most physical tears and punctures happen before water even touches the liner. Dragging the material across a rough surface, dropping a tool, or having a strong gust of wind catch and rip a panel are all common, and costly, mistakes. Careful handling and scheduling enough crew members for the job are essential.
A Note From the Trenches
A welded pipe boot is always the correct answer for sealing a pipe penetration. But what do you do if your pipe isn’t a standard round shape, or if you have a cluster of pipes coming through in one small area? The temptation might be to try to field-fabricate a patch out of flat liner material. Take it from us: Don’t do it.
Field-fabricating a complex patch involves multiple, small, difficult hand-welds in the single most critical area for leaks. It introduces unnecessary risk. For any non-standard penetration, the professional solution is to order a custom-fabricated pipe boot. Since it’s made to your exact specifications in a controlled factory setting, it arrives as a single, perfectly formed piece, and voilà! Your complex, high-risk job is quickly transformed into a simple, reliable task with minimal field welding.
Looking Ahead
We’ve established that a professional, high-quality liner installation is essential for a reliable containment system. But a premium liner and an experienced installation crew both require a significant upfront investment. So, how can you be sure it will pay off on your bottom line?
That’s precisely where we’re headed next. In Chapter 7, we’ll move from the job site to the balance sheet to break down the true Return on Investment (ROI) of a high-performance liner system. We’ll look at how reduced operational costs and increased yields deliver a powerful long-term financial payoff.

