Quick show of hands: Who can name the real enemy on any slope job? If you said gravity, you’re spot on.
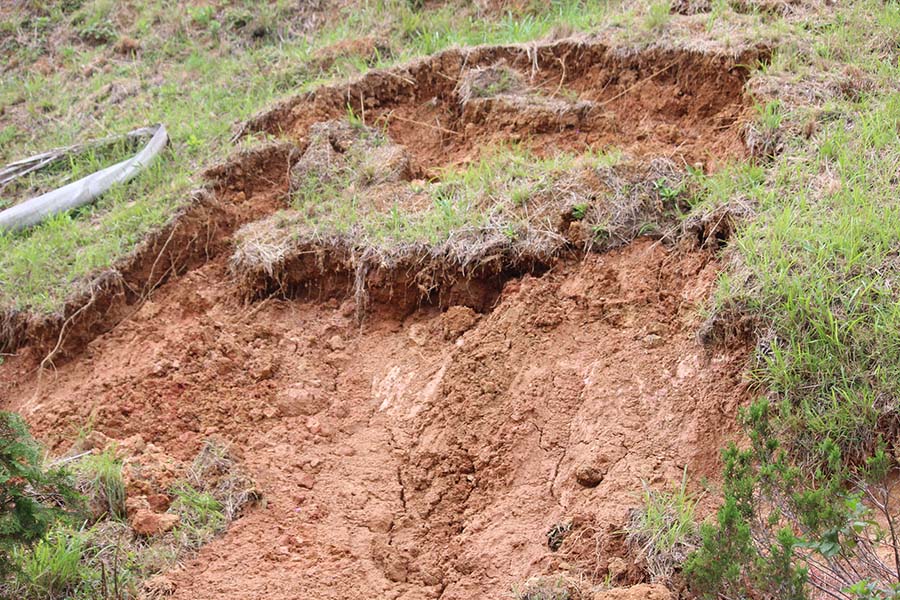
On a flat site, your primary concern is the vertical load, but the moment you step on a 2:1 or 3:1 slope, gravity is actively working against you 24/7, trying to pull your soil, your mulch, and your client’s favorite plants right down to the bottom of the hill.
A lot of crews try to fight this with a thick layer of mulch or by staking jute netting and hoping the plantings take root before the first big storm. That’s a losing bet. While mulch makes a great cosmetic cover, it’s not a structural component—it has literally zero tensile strength. It takes a single heavy rain to saturate the soil, and the whole mess slumps and slides, carving rills and gullies right through your work.
The bottom line? You can’t fight a structural force with a cosmetic cover. You have to fight it with engineering. For slopes, that means using a high-strength, slit-film woven geotextile as a permanent, structural reinforcement blanket. The fabric creates a rebar effect in the soil and, when anchored properly, provides the stable foundation you need to lock your slope in place for good.
How Wovens Win the Fight Against Gravity
Reinforcement: The Rebar Effect
As we saw in Chapter 2, high-strength woven fabrics have massive tensile strength (they’re incredibly strong when pulled) and low elongation (they don’t stretch). This is where the rebar analogy comes in.
When you anchor a slit-film woven geotextile over a slope, it provides a reinforcing skin for the soil. The soil particles interlock with the fabric’s texture, and the fabric (which is anchored) holds them in place. Gravity will try to pull the soil mass down the slope—a force called shear stress—but the fabric’s tensile strength resists it, keeping the soil locked in place. This is what stops those catastrophic slumps and slides.
Separation and Drainage: Handling Water and Cover
The same fabric also solves your surface erosion problem—those rills and gullies caused by heavy rain. Just like on a driveway (see Chapter 4), it does this by filling two roles:
Separates and Protects
It permanently separates your vulnerable topsoil from the elements. It stops heavy, splashy raindrops from dislodging soil particles in the first place, and provides a stable, firm base that keeps your expensive mulch or decorative rock from being washed down into the mud and disappearing.
Controlled Drainage
This is the crucial part that a cosmetic cover (like mulch) or an impermeable plastic sheet can’t manage. A slit-film woven fabric is permeable. It allows rainwater to seep through it and into the soil below, but at a controlled, slow rate. This prevents hydrostatic pressure from building up behind the fabric (which could cause a blowout) while stopping the rain from washing your soil away in a destructive sheet.
A slit-film woven geotextile is the right tool because it’s strong enough to provide structural reinforcement and smart enough to manage water, turning an unstable slope into a secure, enduring feature.
Anchoring the Fabric: How to Keep It Put
We’ve established that a woven fabric has the tensile strength and “rebar effect” to win the fight against gravity. But all that strength is useless if the fabric isn’t correctly installed and locked into the earth. On a slope, the entire success of the job depends on anchoring it so it can’t move. A geotextile that ends up in a pile at the bottom of the hill isn’t doing anyone any good.
Start with a Summit Anchor Trench
This, right here, is your most critical step. You must secure the top edge of every fabric panel in an anchor trench. Word to the wise: Start here so the panels don’t slump down the slope while you’re pinning them!
The How
Dig a trench (typically at least 12x12 inches) a few feet back from the crest of the slope. Lay the upper ends of each fabric panel across the bottom of the trench, and then backfill the trench with soil, compacting it carefully as you go.
The Why
This technique creates a deadman anchor. The weight of the compacted soil in the trench locks the fabric in place, ensuring that the load from the slope is transferred to the stable ground behind the crest rather than resting on a few pins.
The Overlap and Shingle Rule
When using multiple panels, managing their overlap is the key to preventing erosion.
The Overlap
As you roll out each new panel, add a generous overlap of 12-24 inches (or more) between each. Remember, this is your rebar—no skimping!
The Shingle Effect
Generally, you’ll try to avoid this, but if your panel configuration calls for horizontal seams, always lay the panels as you would shingles on a roof: the uphill panel must be placed on top of the downhill panel. This is a simple but critical detail to ensure that any water running down the surface flows over the seam, not into it (which would defeat the whole point of the installation).
Staple It Like You Mean It
Staples hold the fabric in place before the topsoil and mulch are applied. Apply generously!
Use the Right Staples
Whenever you’re fighting an inexorable force like gravity, you need heavy-duty, 6- to 8-inch U-shaped staples, not flimsy garden pins. If you’re working with loose soil, 12-inch staples are even better.
Heavy-Up the Seams
Place staples every 1-2 feet along all overlaps.
Secure the Field
In the middle, or field, of the fabric, you still need staples to keep the panel from flapping or shifting. A good pattern is one heavy-duty staple every 10-15 square feet.
These steps are critical because it’s the anchoring that connects the rebar (the fabric) to the concrete (the soil), for a stable, unified system.