
Step-by-Step Installation Best Practices for Large-Scale Commercial Applications
Proper installation directly impacts your geotextile’s effectiveness in controlling weeds, managing moisture, and achieving its expected lifespan. While every farm site has unique characteristics, the following step-by-step best practices apply to most large-scale commercial applications.
Gather Tools and Materials
Before you begin, ensure you have everything on hand:
- Geotextile Rolls: Refer to Chapter 6 for helpful tips on selecting the appropriate type and quantity
- Anchoring Materials: Typically, 6-inch or 8-inch landscape staples (pins or pegs) are used. Longer staples (up to 12 inches) are better for loose soils. The number will depend on the area, soil type, and wind exposure. For long-term or high-stress applications, burying edges in trenches provides maximum security.
- Cutting Tools: A sharp utility knife is essential. For cleaner edges and to prevent fraying, a hot knife or a propane torch with a cutting attachment can be used (exercise caution and ensure fabric compatibility with heat sealing).
- Measuring Tools: Long tape measures for layout and overlaps.
- Safety Gear: Work gloves and eye protection for the crew.
- Manpower: Plan to devote at least two people when deploying large rolls; more if they’re very wide or long or if conditions are breezy.
Laying Out the Fabric
- Start Point: Begin at one end or edge of the area to be covered. If on a slope, starting at the higher end is recommended. On steep slopes, prioritize safety!
- Unrolling: Unroll the fabric smoothly and evenly over the prepared surface. If possible, avoid dragging it over rough spots, even on a prepared bed.
- Orientation: Align the fabric according to your planting plan (e.g., down the length of rows or beds).
- Tension: The fabric should be laid out evenly to remove prominent wrinkles and ensure good soil contact. Avoid overstretching, which can stress fabric or anchors.
Anchoring the Fabric
Secure anchoring is vital to keep the fabric in place and prevent weed growth at edges or seams.
- Edges: Secure all exterior edges firmly with landscape staples. Use 6-inch staples for firm soils and 8-12 inches for loose/sandy soils to improve hold. Space 3-5 ft apart, reducing to 1-2 ft in windy/loose conditions (even with longer staples).
- Overlaps/Seams: Overlap pieces 6-12 inches (or more for aggressive weeds). Shingle the overlaps (upslope piece over downslope) to promote efficient runoff on slopes.
- Standard Overlap Pinning: For most overlaps, drive staples through both layers, 1-2 inches from the top piece’s edge, using perimeter spacing. This secures the top edge against most weeds.
- Enhanced Overlap Pinning (Addressing Shifting and Persistent Weeds):
Add a second staple line through both layers near the underlying fabric’s edge or aggressive weeds, slopes, or maximum seam integrity. This boosts shift resistance and weed blocking.
- Interior Anchoring: For wide expanses of fabric, especially in windy locations, place occasional anchors in the interior field of the fabric (e.g., every 10-15 feet) to prevent wind uplift.
Cutting and Fitting the Fabric
Once the main sections of your woven ground cloth are laid out and anchored, you’ll probably need to make cuts to fit it around existing obstacles, create openings for new plants, or trim it to length. Clean, strategic cuts help maintain the fabric’s integrity and effectiveness.
- Tools for Cutting: As our initial tool list mentioned, a sharp utility knife is your go-to for most cuts. A hot knife or a propane torch equipped with a specialized cutting tip can be used for applications where you want to prevent fraying at the cut edge (especially for numerous planting holes or in high-wear areas). These tools melt the polypropylene fabric as they cut, creating a sealed edge. Always exercise extreme caution when using heat tools, ensure the fabric is suitable for melt-sealing, and be mindful of fire safety and adequate ventilation.
- Working Around Existing Plants or Obstacles (e.g., Trees, Posts, Irrigation Risers): To fit the fabric around an existing plant stem or post, make an “X” or star-shaped cut, starting from the point closest to the obstacle and radiating outwards just enough to allow the fabric to be eased around it. However, if working around perennial plants like trees, vines, or shrubs, ensure the opening is generous enough to accommodate several years of anticipated trunk or stem diameter increase. A slightly larger opening is crucial to prevent future constriction of perennials.
- Placing and Securing the Flaps: Carefully lay the cut flaps snugly around the base of the plant or post, overlapping them slightly if you prefer. Secure the flaps and the fabric around the obstacle with additional landscape staples to prevent weed growth and keep the fabric neat.
Creating Planting Holes (for New Plantings)
- X-Slits: The simplest method is to use your utility knife to cut an “X” where each plant will go. The plant can then be installed through the slit, and the four flaps can help suppress weeds close to the stem.
- Circular or Square Cuts: Cut holes just large enough for planting. For new perennials (trees, vines, bushes), cut wider openings (2-4 inches more than current stem diameter) for future growth to prevent girdling. Briefly mulch any temporarily exposed soil around young perennials over the fabric.
- Burning Holes (with caution): Some growers use a custom-made metal cylinder or a large can heated with a torch to quickly burn uniform planting holes. This method also seals the edges but requires significant care and appropriate safety gear. It’s best suited for open-field applications away from flammable materials.
Cutting to Length
- Ends of Rows: When you reach the end of a row or need to trim a piece, use your utility knife, ideally against a straight edge for a cleaner line if it’s a long cut.
- Sufficient Fabric: Ensure you leave enough fabric to anchor the end securely, perhaps by folding it under an inch or two before pinning for a more durable edge, especially if not heat-sealed.
Why it’s Important
Careful cutting and fitting ensure maximum coverage, minimize weed opportunities, and create a professional and effective installation.
Integrating Your Agrotextile System with Existing Farm Infrastructure and Machinery
Your agro-textile system is rarely installed in isolation; it must integrate effectively with your overall farm setup. Thoughtful integration with existing or planned infrastructure like irrigation lines, trellising, pathways, and considerations for machinery access will ensure the fabric performs optimally without hindering other essential operations. Planning this integration beforehand saves time and prevents future headaches.
Irrigation Systems
The most common consideration is how the material will work with irrigation, particularly drip systems.
Drip Lines Under the Fabric
Many growers prefer to lay drip irrigation lines on the prepared soil before installing the geotextile.
- Pros: Protects drip lines from UV degradation and physical damage. Water is delivered directly to the soil, minimizing surface evaporation.
- Cons/Considerations: Leaks can be harder to detect/repair. The drip line layout must be finalized before geotextile installation. Mark line locations to avoid damage from anchoring staples.
Drip Lines On Top of the Fabric
Alternatively, drip lines can be laid on top of the installed geotextile.
- Pros: Drip lines are easy to inspect, repair, adjust line placement, or reconfigure.
- Cons/Considerations: Drip lines are exposed to UV/physical damage; emitters risk clogging from surface debris. Position emitters over planting holes and secure lines to prevent shifting.
Overhead Sprinklers
These are generally compatible with slit film ground covers. The fabric helps reduce soil splash from sprinkler impact and allows water to infiltrate the soil.
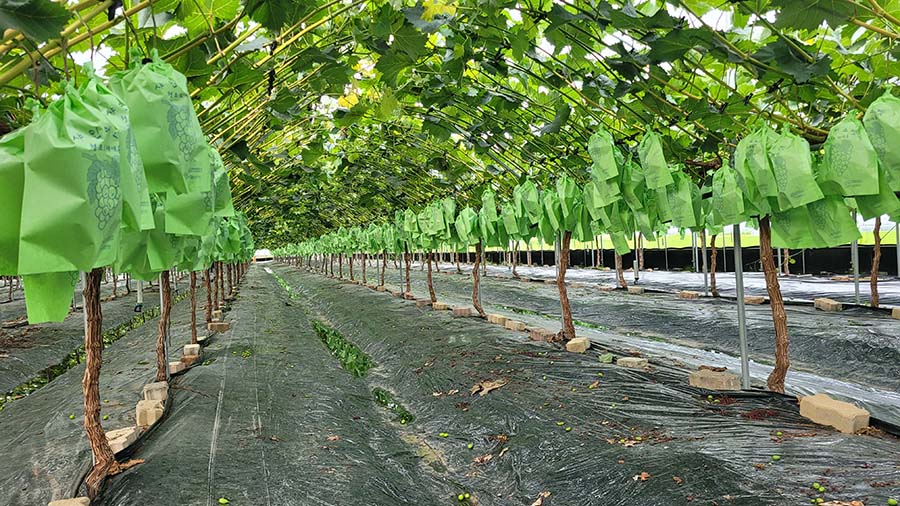
Trellising Systems
For crops requiring trellises (e.g., high-density orchards, vineyards, certain berries, vining vegetables):
- Posts Installed Before Fabric: If trellis posts are already in place or installed first, you will need to cut the fabric to fit around them, as discussed in Cutting and Fitting. Ensure the fabric is laid snugly and securely pinned around the base of each post to prevent weed growth.
- Posts Installed Through Fabric: If posts are installed after the fabric is laid, carefully mark their locations, then cut a clean ‘X’ or a small circular hole for post insertion. Driving posts directly through the fabric without a pre-cut hole causes tears. Additional pinning or reinforcement around these penetration points may be needed.
- Wires and Anchors: Prevent wear from rubbing/snagging by low wires or ground anchors.
Pathways and Machinery Access
Pathways
If you use the geotextile in pathways for weed control (perhaps covered with gravel or woodchips), ensure a good overlap (at least 6 inches) with the fabric used on adjacent beds and secure it well. If pathways are bare ground or use a different mulch, ensure the fabric edges along the beds are firmly anchored to prevent tripping and damage from traffic.
Machinery Traffic
Slit film ground covers are designed for foot traffic and light equipment, not heavy tractors. For regular light machinery use, choose a durable, heavier-weight fabric. Secure edges near access lanes (bury or use berms). Plan layout for machinery movement to avoid stress/tears at corners or row ends.
Long-Term Maintenance & Care for Extended Lifespan
- Keep it Clean: Regularly sweep, blow, or wash off soil and debris. This prevents surface weeds, maintains permeability, and keeps the installation neat.
- Inspect and Repair Promptly: Periodically check for damage (tears, punctures, degradation), especially at seams, edges, or around planting holes. Repair small damage immediately using UV-resistant tape or apply fabric patches with staples or adhesive. Replace heavily damaged sections.
- Manage Weed Escapes: Promptly hand-pull weeds at holes, edges, or damaged spots. If weeds grow through damaged areas, remove the weeds then repair the breach.
- Off-Season Considerations: Permanent installs need good winter drainage. For seasonal removal: clean, dry, roll, and store protected from sun/pests.
